Japanese Egg Sandwich – Easy Tamago Sando Recipe
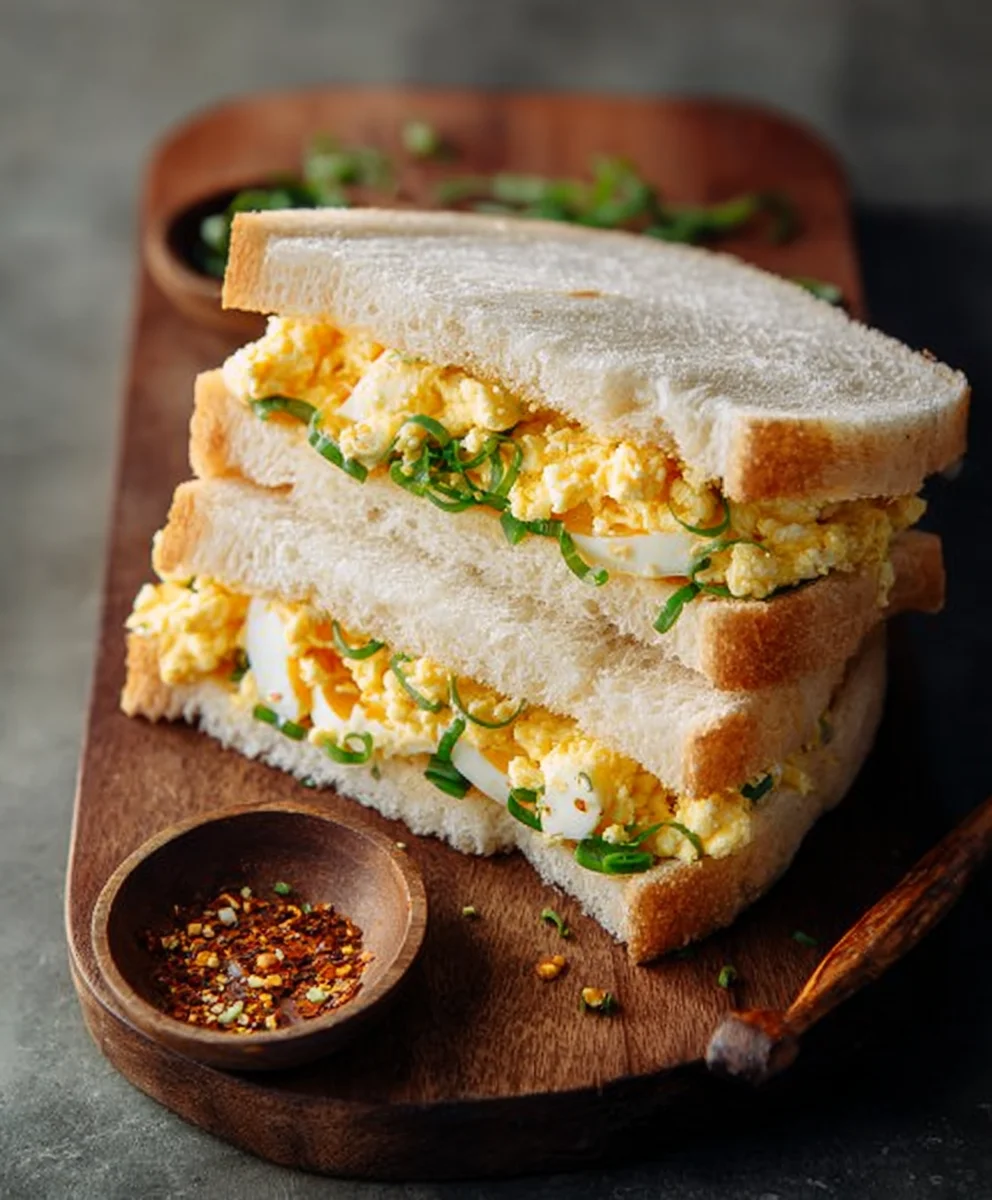
Japanese Egg Sandwich (Tamago Sando): the unassuming yet utterly sublime delight that has captured hearts and taste buds worldwide. If you’ve ever found yourself scrolling through social media, you’ve likely encountered its pillowy soft bread, vibrant yellow filling, and simple elegance. But what is it about this seemingly basic egg sandwich that ignites such passion? It’s the perfect harmony of textures and flavors: the cloud-like, impossibly soft Japanese milk bread, known as shokupan, provides a delicate canvas for the star of the show – the lusciously creamy, subtly sweet, and impossibly smooth egg salad. Unlike its Western counterparts, the Japanese Egg Sandwich (Tamago Sando) eschews chunky textures for a silken perfection, achieved through a masterful blend of Japanese mayonnaise, a hint of sugar, and often a whisper of mustard or dashi for that unmistakable umami depth. It’s comfort food elevated to an art form, a testament to how simple ingredients, prepared with care and precision, can create something truly extraordinary.
Ingredients:
- 6 large Pete and Gerry’s Organic Eggs
- 1/4 teaspoon sugar
- 1/4 teaspoon salt
- 1/4 teaspoon ground black pepper
- 1 to 2 teaspoons milk (or plant milk, optional)
- 4 tablespoons Japanese mayonnaise
- 4 slices Japanese milk bread
- 2 tablespoons unsalted butter, softened
- Chives, sliced (for garnish, optional)
Preparing the Egg Filling
This is where the magic of the Japanese Egg Sandwich begin extracts. We’re going to create a rich, creamy, and perfectly seasoned egg salad that will be the star of our tamago sando. Start by carefully cracking your 6 large Pete and Gerry’s Organic Eggs into a medium saucepan. Add just enough cold water to cover the eggs by about an inch. This ensures even cooking and prevents the eggs from cracking during boiling.
Place the saucepan over medium-high heat and bring the water to a rolling boil. Once boiling, immediately reduce the heat to low, cover the saucepan tightly, and let the eggs cook for precisely 10 minutes. This is the sweet spot for hard-boiled eggs that are perfectly cooked through but not rubbery. While the eggs are boiling, you can start prepping your other ingredients to save time.
Once the 10 minutes are up, carefully drain the hot water from the saucepan. Immediately fill the saucepan with ice-cold water or transfer the eggs to a bowl filled with ice water. This rapid cooling process, known as shocking, is crucial for stopping the cooking and making the eggs easier to peel. Let the eggs sit in the ice bath for at least 5-10 minutes until they are completely cool to the touch.
Now comes the satisfying part: peeling the eggs. Gently tap each egg on a hard surface and then roll it between your palms to loosen the shell. The cold shock should have made the shells slide off with ease. Once peeled, place the hard-boiled eggs into a clean mixing bowl. Using a fork or a potato masher, mash the eggs thoroughly. You want a texture that is finely broken down, almost like a coarse paste, with very few large chunks remaining. This will ensure a smooth and creamy egg filling.
To the mashed eggs, add the 4 tablespoons of Japanese mayonnaise. Japanese mayonnaise, like Kewpie, is known for its rich, tangy, and slightly sweet flavor profile, which is essential for an authentic tamago sando. Stir the mayonnaise into the eggs until it’s completely incorporated, creating a luxurious and cohesive mixture. Next, add the 1/4 teaspoon of sugar, 1/4 teaspoon of salt, and 1/4 teaspoon of ground black pepper. If you’re using milk or plant milk for a slightly softer texture, now is the time to add 1 to 2 teaspoons of it. Stir everything together until all the seasonings are evenly distributed. Taste the mixture and adjust the salt, pepper, or sugar if needed to achieve your desired flavor balance. The goal is a creamy, well-seasoned egg filling with a subtle sweetness and a hint of pepper.
Assembling the Sandwich
With our luscious egg filling ready, it’s time to assemble the Japanese Egg Sandwich. Take your 4 slices of Japanese milk bread. This bread is wonderfully soft and slightly sweet, making it the perfect canvas for our sandwich. If your bread isn’t already sliced, carefully slice it about 1/2 inch thick.
Next, take your softened unsalted butter. The butter adds another layer of richness and helps to create a delightful crust when the sandwich is pressed. Generously spread a thin, even layer of the softened butter on one side of each of the 4 slices of bread. This buttery layer will be on the outside of the sandwich.
Now, it’s time to build the sandwich. On the unbuttered side of two of the bread slices, generously spread half of the prepared egg filling onto each. Don’t be shy with the filling; we want a substantial layer. Spread it evenly from edge to edge, ensuring every bite will be packed with delicious egg salad. You can use the back of a spoon or an offset spatula to get a smooth and even layer.
Carefully take the remaining two slices of bread and place them on top of the egg-filled slices, with the buttered side facing outwards. Gently press down on the sandwiches to help compact the filling and ensure they hold together. This is a simple sandwich to make, but the quality of the ingredients truly shines through.
Finishing Touches and Serving
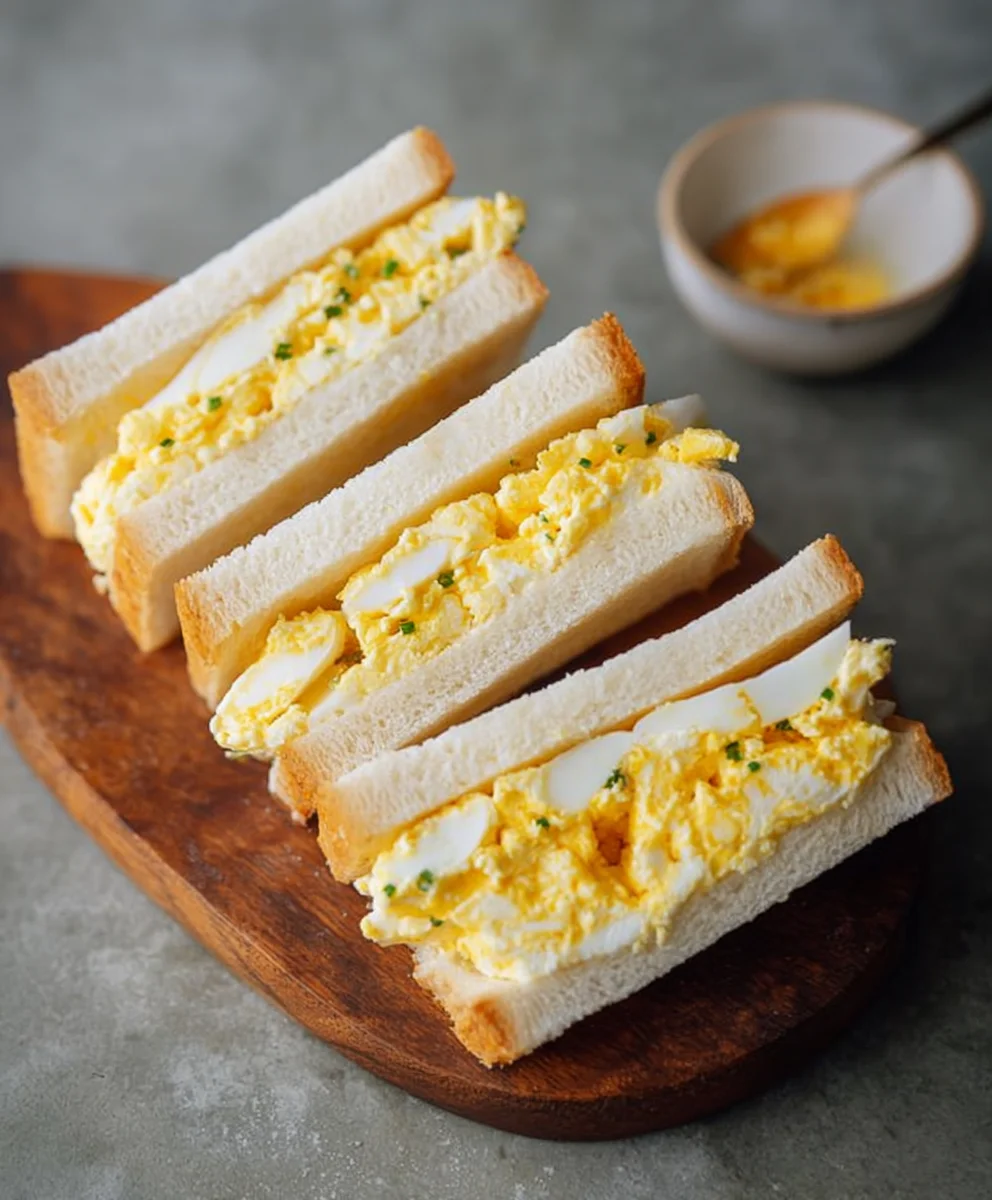
The final steps involve creating that signature neatness of the tamago sando. Using a sharp knife, carefully trim off the crusts from all four sides of each sandwich. This step is traditional and not only makes the sandwich look elegant but also ensures a tender bite, as the crusts can sometimes be a bit tougher, especially with softer breads.
Once the crusts are removed, take your knife and cut each sandwich diagonally in half. This classic presentation is instantly recognizable and makes the sandwich easy to handle and eat. You’ll notice the beautiful layers of fluffy egg filling peeking out from the soft milk bread.
If you have chives and wish to garnish your sandwiches, now is the perfect time. Sprinkle a small amount of the finely sliced chives over the exposed egg filling on the cut edge of the sandwiches. The fresh, mild oniony flavor and vibrant green color of the chives add a beautiful visual appeal and a subtle extra flavor dimension.
Serve your Japanese Egg Sandwiches immediately. They are best enjoyed fresh when the bread is at its softest and the filling is creamy. These sandwiches are perfect for a quick breakfast, a light lunch, a delightful snack, or even as part of a bento box. The simplicity of the ingredients, combined with careful preparation, results in an incredibly satisfying and delicious treat.
Conclusion:
And there you have it – your very own delicious Japanese Egg Sandwich (Tamago Sando)! We’ve journeyed through the simple yet rewarding steps to create this incredibly popular and satisfying sandwich. Its creamy, fluffy egg filling nestled between soft, pillowy bread is a testament to the beauty of minimal ingredients yielding maximum flavor. We hope you enjoyed making and tasting this delightful treat. Don’t hesitate to experiment and make it your own!
For serving, the Japanese Egg Sandwich (Tamago Sando) is perfect as is for a quick lunch, a light dinner, or even a sophisticated snack. It pairs wonderfully with a cup of green tea or a light consommé. For variations, consider adding a pinch of shichimi togarashi for a hint of spice, or a thin layer of Kewpie mayonnaise infused with wasabi for an extra kick. You can also swap out the bread for milk bread, brioche, or even lightly toasted sourdough for a different texture. The possibilities are truly endless!
We encourage you to embrace the simplicity and deliciousness of the Japanese Egg Sandwich (Tamago Sando) and share it with friends and family. It’s a recipe that’s sure to become a favorite in your repertoire.
Frequently Asked Questions:
Q1: What kind of bread is best for a Japanese Egg Sandwich (Tamago Sando)?
The most traditional and recommended bread for a Japanese Egg Sandwich (Tamago Sando) is Japanese milk bread (shokupan). Its incredibly soft, fluffy, and slightly sweet texture is ideal. However, if you can’t find shokupan, a soft white bread or even a good quality brioche will work well.
Q2: Can I make the egg filling ahead of time?
Yes, absolutely! The egg filling for your Japanese Egg Sandwich (Tamago Sando) can be prepared a day in advance and stored in an airtight container in the refrigerator. This makes assembly even quicker when you’re ready to enjoy your sandwich.
Japanese Egg Sandwich – Easy Tamago Sando Recipe
A simple and delicious recipe for a classic Japanese egg sandwich (Tamago Sando), featuring a creamy, seasoned egg filling and soft Japanese milk bread.
Ingredients
-
6 large Pete and Gerry’s Organic Eggs
-
1/4 teaspoon sugar
-
1/4 teaspoon salt
-
1/4 teaspoon ground black pepper
-
1 to 2 teaspoons milk (or plant milk)
-
4 tablespoons Japanese mayonnaise
-
4 slices Japanese milk bread
-
2 tablespoons unsalted butter, softened
-
chives, sliced (for garnish)
Instructions
-
Step 1
Boil the eggs: Place eggs in a saucepan, cover with cold water by an inch, bring to a boil, then reduce heat to low, cover, and cook for 10 minutes. Immediately shock in ice water until cool. -
Step 2
Prepare the egg filling: Peel and mash the cooled hard-boiled eggs thoroughly with a fork or masher. Mix in Japanese mayonnaise, sugar, salt, and pepper until well combined. Add milk if desired for a softer texture, and adjust seasonings to taste. -
Step 3
Butter the bread: Generously spread softened butter on one side of each of the 4 slices of Japanese milk bread. -
Step 4
Assemble the sandwiches: Spread half of the egg filling onto the unbuttered side of two bread slices. Top with the remaining two bread slices, buttered side up. Gently press. -
Step 5
Finish and serve: Carefully trim off the crusts from all sides of each sandwich. Cut each sandwich diagonally in half. Garnish with sliced chives if desired. Serve immediately.
Important Information
Nutrition Facts (Per Serving)
It is important to consider this information as approximate and not to use it as definitive health advice.
Allergy Information
Please check ingredients for potential allergens and consult a health professional if in doubt.