Pear Brie Salad Skewers – Easy Appetizer Idea
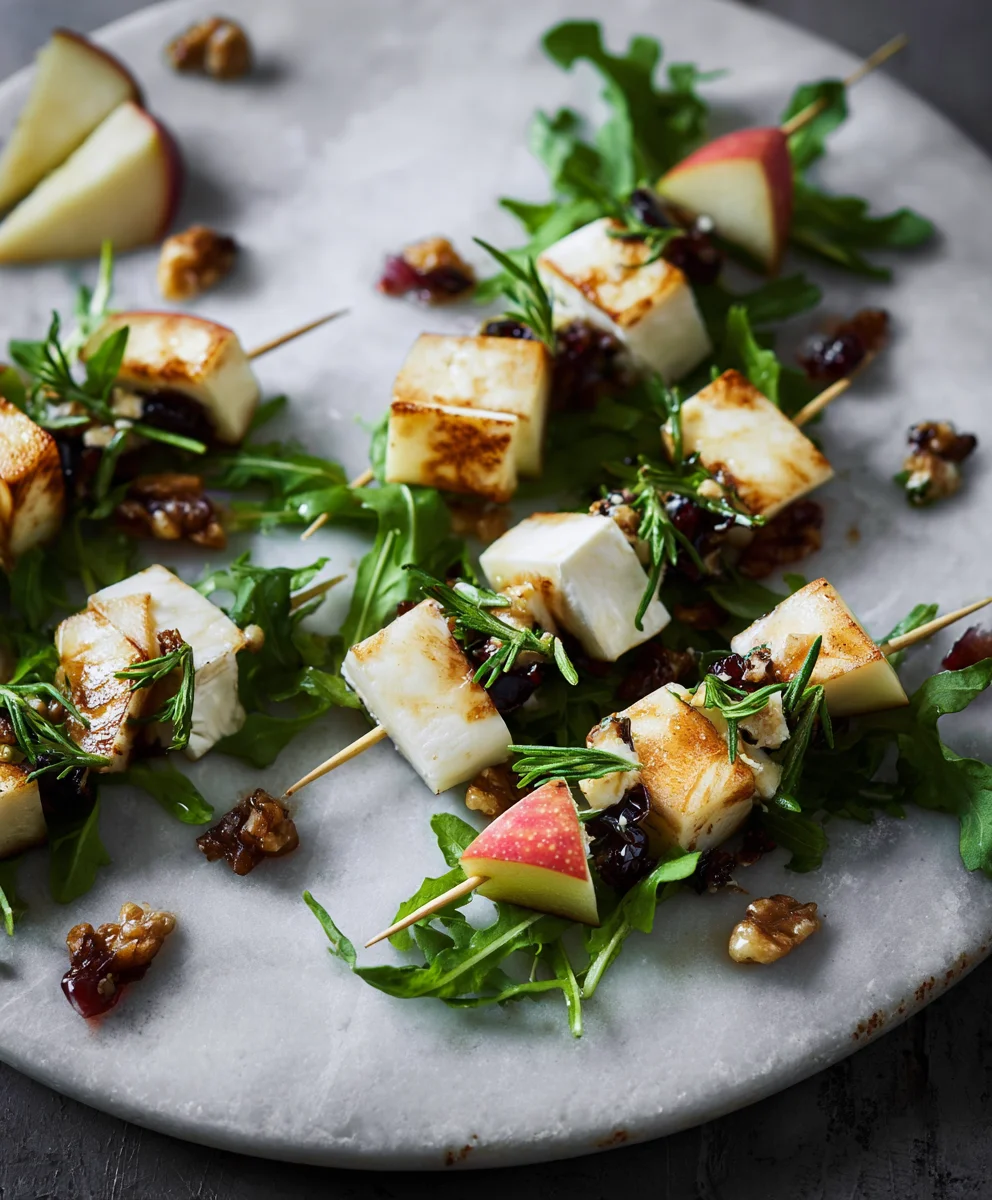
Pear & Brie Cheese Salad Skewers are more than just a delightful appetizer; they’re a miniature masterpiece of flavor and texture that consistently steals the show at any gathering. Imagin extracte the perfect bite: the crisp sweetness of ripe pears mingling with the creamy, slightly tangy richness of warm brie, all balanced by the refreshing crunch of mixed greens. It’s this harmonious interplay of sweet, savory, and fresh that makes Pear & Brie Cheese Salad Skewers an absolute crowd-pleaser. People adore them because they offer a sophisticated yet incredibly easy way to impress guests without spending hours in the kitchen. What truly sets these skewers apart is their elegant simplicity; they transform humble ingredients into something truly special, making them ideal for parties, brunches, or even a light, elegant lunch. Let’s dive into how you can recreate this effortless culinary charm.
Ingredients:
- 2 ripe but firm pears
- Approximately 8 ounces of creamy Brie cheese
- Approximately 2 cups of fresh baby arugula
- Approximately 1/4 cup of raw walnuts, roughly chopped
- Balsamic glaze, for drizzling (or balsamic vinegar if glaze is unavailable)
Preparing the Skewers
Step 1: Prep the Pears
The first step to creating these delightful Pear & Brie Cheese Salad Skewers is to prepare the pears. Select pears that are ripe enough to be sweet and fragrant, but still firm to the touch so they hold their shape when skewered. Avoid pears that are too soft, as they will become mushy. I like to use Bosc or Anjou pears for this recipe as they have a lovely texture and subtle sweetness that complements the Brie beautifully. Wash the pears thoroughly under cool running water. You can choose to peel the pears or leave the skin on; I personally prefer leaving the skin on for added color and a touch of rustic charm, but if you find the skin a bit tough, a quick peel will work wonders. Core the pears using a sharp knife or a melon baller, removing the tough central part with the seeds. Then, cut each pear into bite-sized cubes, roughly 1-inch pieces. Aim for uniformity in size so that they cook or chill evenly and are easy to eat off the skewer.
Step 2: Prepare the Brie Cheese
Next, we’ll prepare the Brie cheese. Cut the rind off the Brie if you prefer a milder flavor and smoother texture. Some people enjoy the slightly sharper taste of the rind, so this is entirely a matter of personal preference. Similar to the pears, cut the Brie into bite-sized cubes, aiming for approximately 1-inch pieces. The goal is to have pieces that are substantial enough to be recognized as cheese but not so large that they overwhelm the other components of the skewer. If your Brie is very soft, you might find it helpful to chill it in the refrigerator for about 15-20 minutes before cutting. This will firm it up slightly, making it easier to handle and cube cleanly.
Step 3: Assemble the Skewers
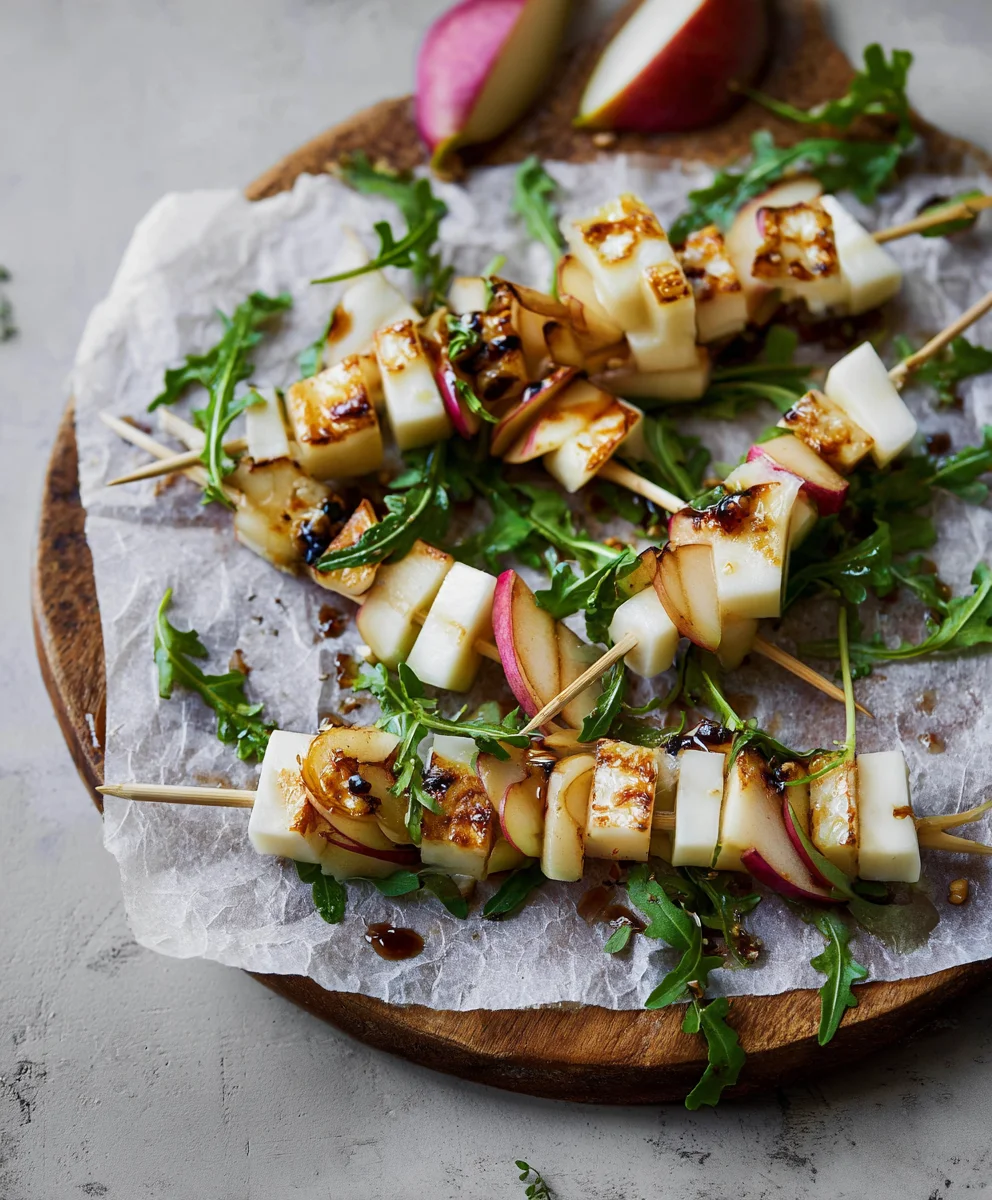
Now for the fun part – assembling the skewers! I recommend using short cocktail skewers for this recipe, as they are the perfect size for appetizers. Begin extract by threading a piece of Brie onto a skewer. Follow this with a cube of pear. Then, gently tuck a few leaves of baby arugula onto the skewer. You can either thread them flat or scrunch them up slightly depending on how much volume you want. Repeat this pattern – Brie, pear, arugula – until you have a visually appealing and balanced skewer. Don’t overcrowd the skewers; you want each component to be distinct and easy to bite into. You’ll likely use about 2-3 layers of each ingredient per skewer, depending on their size. As you assemble, try to alternate the colors and textures for maximum visual appeal.
Step 4: Add the Walnuts and Glaze
Once your skewers are assembled, it’s time to add the finishing touches. Sprinkle the chopped raw walnuts over the assembled skewers. The walnuts add a wonderful crunch and a slightly earthy flavor that pairs exceptionally well with the sweet pear and creamy Brie. You can either sprinkle them directly onto the skewers or place them in a small bowl and roll the assembled skewers through the nuts to coat them. For the final flourish, drizzle the balsamic glaze generously over the skewers. The sweet and tangy notes of the balsamic glaze are crucial in balancing the richness of the Brie and the sweetness of the pear. If you are using balsamic vinegar instead of glaze, you may want to reduce it slightly in a small saucepan over medium-low heat until it thickens to a syrupy consistency. A little goes a long way, so drizzle it artfully to ensure each skewer gets a touch of its deliciousness.
Step 5: Chill and Serve
Before serving, it’s a good idea to let the Pear & Brie Cheese Salad Skewers chill for at least 15-30 minutes in the refrigerator. This allows the flavors to meld together beautifully and ensures that the Brie is perfectly firm. Arrange the skewers on a serving platter. You can place them flat or stand them up slightly, depending on your presentation preference. For an extra touch of elegance, you can place a few extra arugula leaves or a sprinkle of walnuts around the platter. These skewers are perfect as an appetizer for parties, a light lunch, or even as a sophisticated snack. They are best served chilled, so plan accordingly. The combination of sweet pear, creamy Brie, peppery arugula, crunchy walnuts, and tangy balsamic glaze creates a symphony of flavors and textures that is sure to impress.
Conclusion:
And there you have it – the delightful and surprisingly simple recipe for Pear & Brie Cheese Salad Skewers! We hope you enjoyed learning how to bring together this elegant yet effortless appetizer. This dish truly shines with its perfect balance of sweet pears, creamy brie, and the peppery bite of arugula, all enhanced by a light vinaigrette. It’s a fantastic way to impress guests without spending hours in the kitchen.
For serving, these Pear & Brie Cheese Salad Skewers are best enjoyed immediately after assembly to keep the pears fresh and the brie perfectly soft. They make a wonderful starter for a dinner party, a sophisticated addition to a cheese board, or even a light lunch on a warm afternoon. Feel free to get creative with variations! You could swap the pears for crisp apples or juicy figs. Beef Prosciutto or crispy beef pancetta can add a savory crunch, and a drizzle of honey or balsamic glaze can offer another layer of flavor. Don’t be afraid to experiment and make these Pear & Brie Cheese Salad Skewers your own!
Frequently Asked Questions:
Q1: Can I make the Pear & Brie Cheese Salad Skewers ahead of time?
While some components can be prepped, it’s best to assemble the Pear & Brie Cheese Salad Skewers just before serving. This prevents the pears from browning and the arugula from wilting. You can chop the pears, cube the brie, and whisk the vinaigrette in advance, then assemble them when you’re ready to eat.
Q2: What kind of pears work best for this recipe?
For these Pear & Brie Cheese Salad Skewers, firm but ripe pears are ideal. Varieties like Bosc, Anjou, or Bartlett are excellent choices because they hold their shape well and offer a good balance of sweetness and texture. Avoid overripe pears that can become mushy.
Pear Brie Salad Skewers – Easy Appetizer Idea
A delightful and easy appetizer featuring sweet pears, creamy Brie cheese, peppery arugula, crunchy walnuts, and a tangy balsamic glaze, all served on skewers for a sophisticated bite.
Ingredients
-
2 ripe but firm pears
-
Approximately 8 ounces of creamy Brie cheese
-
Approximately 2 cups of fresh baby arugula
-
Approximately 1/4 cup of raw walnuts, roughly chopped
-
Balsamic glaze, for drizzling (or balsamic vinegar if glaze is unavailable)
Instructions
-
Step 1
Prepare the pears: Select ripe but firm pears. Wash, core, and cut into bite-sized cubes (about 1-inch pieces). Leave the skin on for color or peel if preferred. -
Step 2
Prepare the Brie cheese: Cut off the rind if desired. Cut the Brie into bite-sized cubes (approximately 1-inch pieces). Chill for 15-20 minutes if very soft. -
Step 3
Assemble the skewers: Thread a piece of Brie onto a cocktail skewer, followed by a cube of pear, and then tuck in a few leaves of baby arugula. Repeat this pattern (Brie, pear, arugula) 2-3 times per skewer, not overcrowding. -
Step 4
Add the walnuts and glaze: Sprinkle the chopped raw walnuts over the assembled skewers. Drizzle generously with balsamic glaze. If using balsamic vinegar, reduce it slightly until syrupy. -
Step 5
Chill and serve: Chill the skewers in the refrigerator for at least 15-30 minutes to allow flavors to meld. Arrange on a platter and serve chilled.
Important Information
Nutrition Facts (Per Serving)
It is important to consider this information as approximate and not to use it as definitive health advice.
Allergy Information
Please check ingredients for potential allergens and consult a health professional if in doubt.